Automating Erasure: The Efficient Path to Hard Drive Sanitisation
Turning mountains of hard drives into molehills, securely and efficiently. Every story has a beginning, and ours started with the acquisition of a multitude of servers from a prest...

Turning mountains of hard drives into molehills, securely and efficiently.
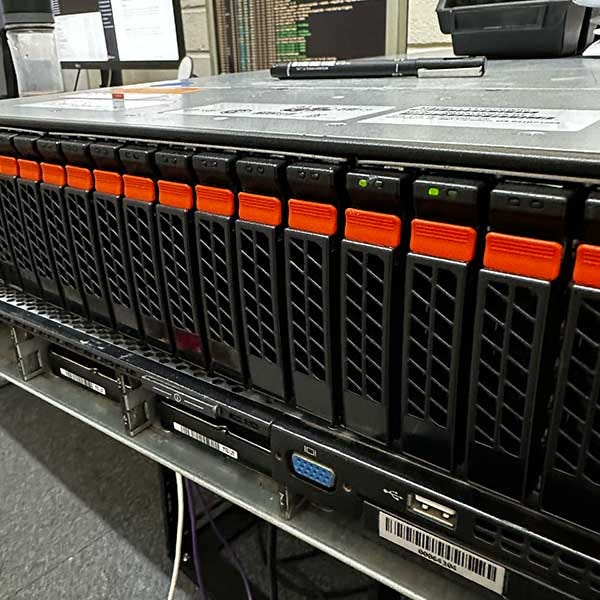
Every story has a beginning, and ours started with the acquisition of a multitude of servers from a prestigious client. Packed within these electronic titans lay numerous hard drives, each one needing secure, efficient, and rapid erasure. This presented us with an interesting challenge and a unique opportunity to perfect our drive sanitisation process. Armed with a 2U rack server with 24 slots for 2.5-inch hard drives, we set out on this daring journey.
The Task at Hand
The first order of business was loading up our 2U rack server with hard drives, setting the stage for the automated sanitisation process. The goal? To ensure that every bit of data was thoroughly erased in an unattended, efficient, and quick manner.
To achieve this, we created a bespoke bash script (more on this later). However, before running the script, we prepared the server environment by installing Ubuntu and the necessary software on an internally attached SSD, separate from the controller housing our subject hard drives.
The Unexpected Hurdle
Like any great story, ours also had its share of challenges. The biggest one was identifying which physical drive housed the root drive partitions. This proved to be a tough nut to crack due to the use of Logical Volume Management (LVM) by the Ubuntu server. Our solution? We defined /dev/sda, the root drive, to be simply excluded from our script, not very elegant, however simple indeed.
The Bash Script
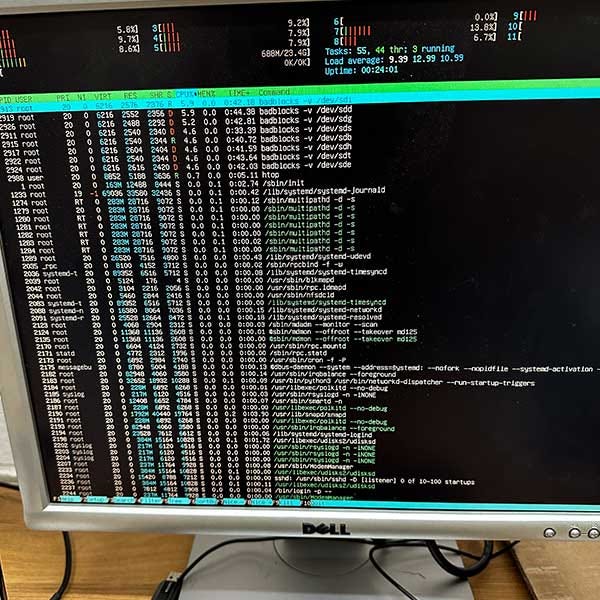
At the core of our solution was a bash script we meticulously developed. This script automated the entire sanitisation process, starting by scanning all the devices, excluding the root drive and partition numbers. It then fetched the details such as serial number, model and capacity for each device using ‘smartctl’.
For drives with inaccessible or missing details, it ensured they were excluded from the process. For the remaining drives, it conducted a S.M.A.R.T. test and a ‘badblocks’ test to identify any potential corrupted sectors. Any drive with errors was prudently excluded from the overwrite process.
The magic happened when the script checked each drive for ATA Secure Erase support. If supported, the erase command was executed, offering a faster and more secure method of sanitisation. Otherwise, the script efficiently overwrote the drive with random data using in-built unix dd command.
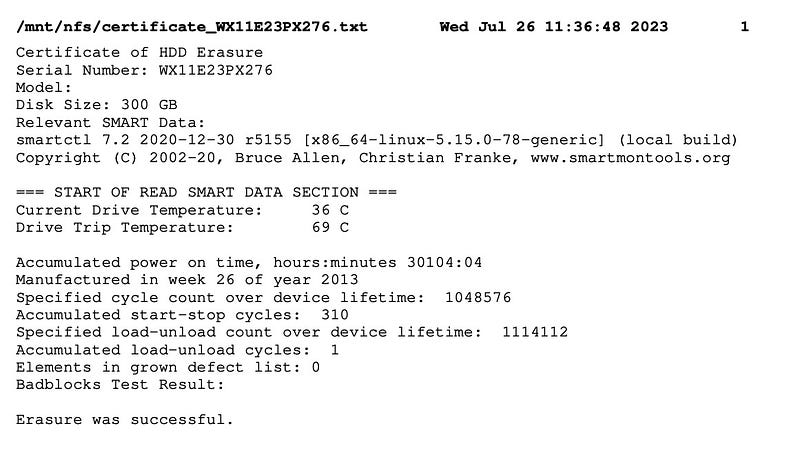
The final act of the script was to generate a certificate of erasure, bearing the badge of successful sanitisation. Each certificate included the drive details, S.M.A.R.T data, the result of the ‘badblocks’ test, and a confirmation of successful erasure.
As we installed the NFS-server on the machine it allowed us to save the certs on the network share and access it from office computers.
Final Thoughts
The execution of this script dramatically sped up our hard drive sanitisation process. The efficient, automated procedure we developed was particularly effective for SSDs supporting ATA Secure Erase, allowing us to securely sanitise hard drives on a large scale.
The script can be found here: